
MicrojobEngine – our premium marketplace WordPress theme has been upgraded to version 1.1.
In this latest version, 2 big features that you’ve waited for are now available: Custom Order & Credit Payment. What’s special about these two that make version 1.1 worthwhile? Let’s find out.
Main sections:
- Custom Orders for customized requirements & price
- Custom order diagram
- How this feature works
- Email template
- Use Credits to pay for listings & orders
- The fewer transactions, the less painful
- Updates in User Revenue Report
- Activate & pay by Credits
Custom Orders for customized requirements & price
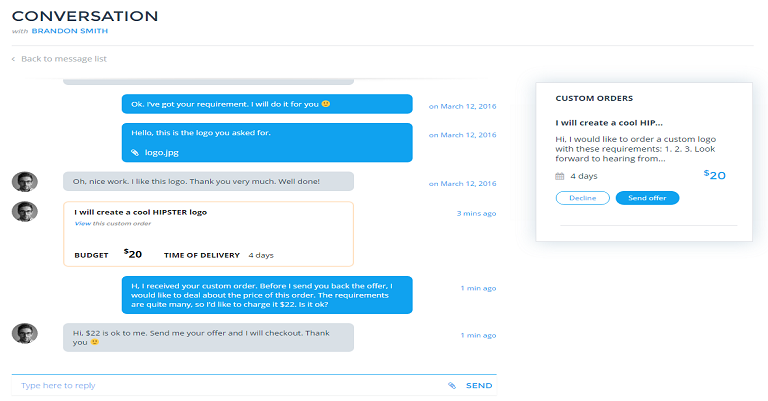
The biggest upgrade of this version is the Custom Order. A buyer may have interest in a Seller but the mJobs offered by the seller do not perfectly suit buyer’s requirement. In this case, buyer can send a custom order to that seller with custom requirements, custom price and time. This custom order also benefits sellers as a new income source besides basic-price orders.
Usually, Custom Orders are expected to have higher price than fixed-price orders. As an admin, this allows you to earn more commission from this upgrade.
A brief diagram of Custom Order
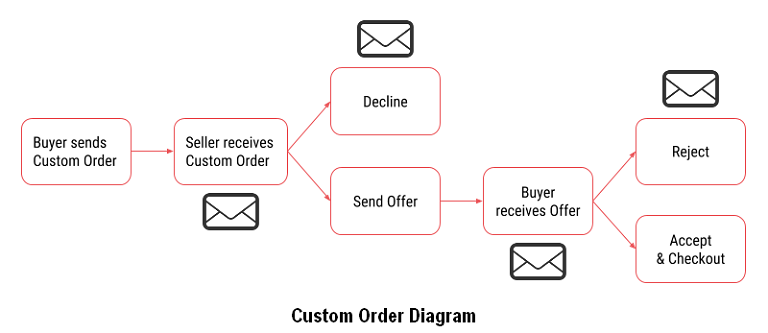
How the flow goes in Custom Orders?
- Buyer sends a Custom Order
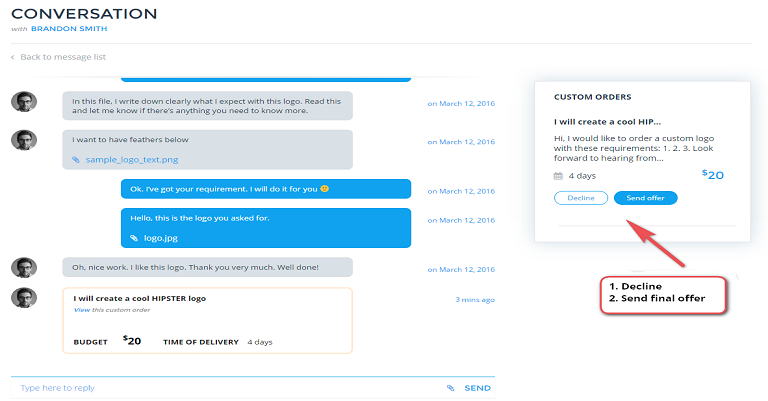
- To send a Custom Order, buyer will go to a mJob detail page, and choose “Send a custom order”.
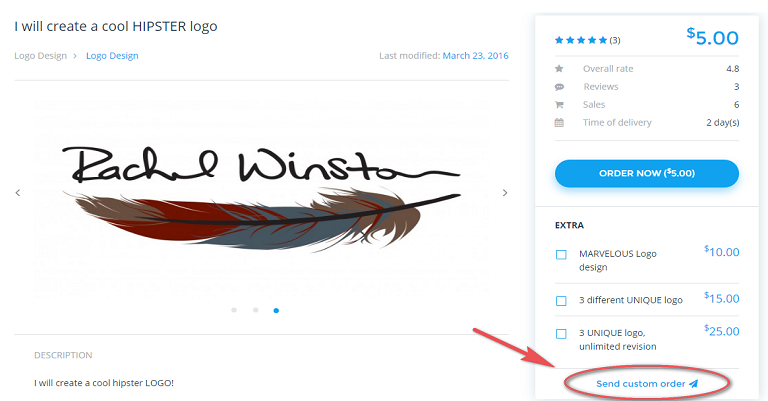
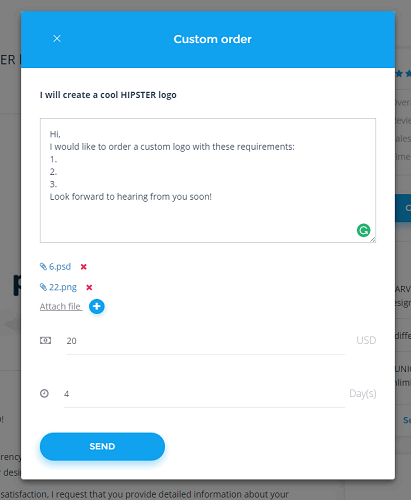
- Fill in the form with requirements for the order, attach files (optional), offer Price and Time. Then Send.
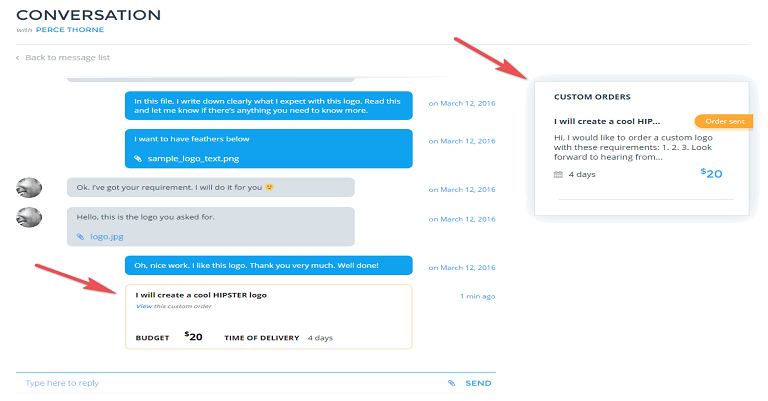
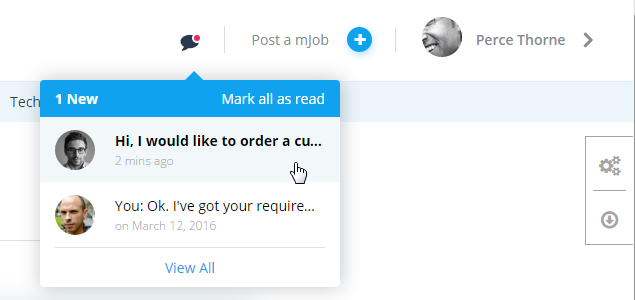
- A successfully sent Custom Order will appear in the message box between buyer and seller.
- Seller receives the Custom Order
- Seller receives a notification in Message box. (And Email notification)
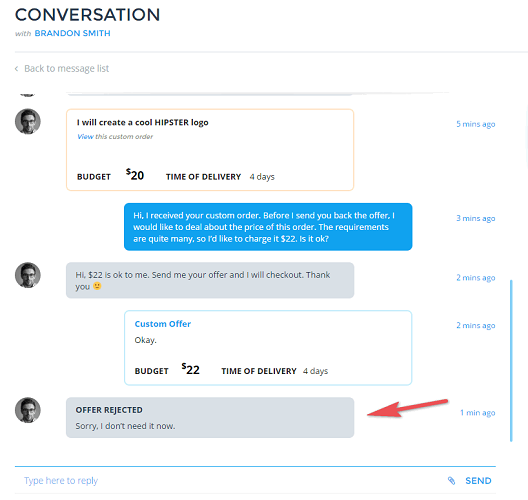
- Seller has 2 options: Decline & then the Custom Order disappears. Or Send the offer to buyer. Once the seller has sent the offer to buyer, both buyer and seller cannot adjust any details of the order. Thus, it is best that seller chats with buyer to reach the final agreement in all terms before sending the offer to buyer.
- Seller’s decision
3.1 Decline the order
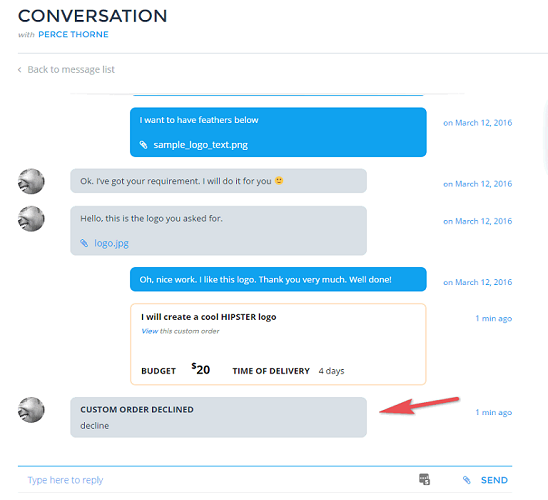
- Seller fills in the Decline form.
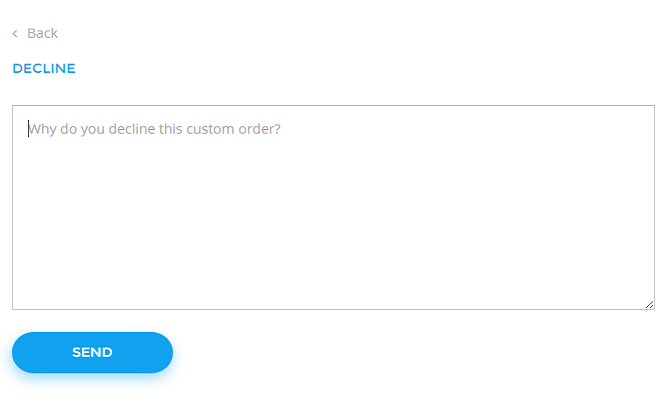
- Buyer will notice the message of declined order. (And Email notification)
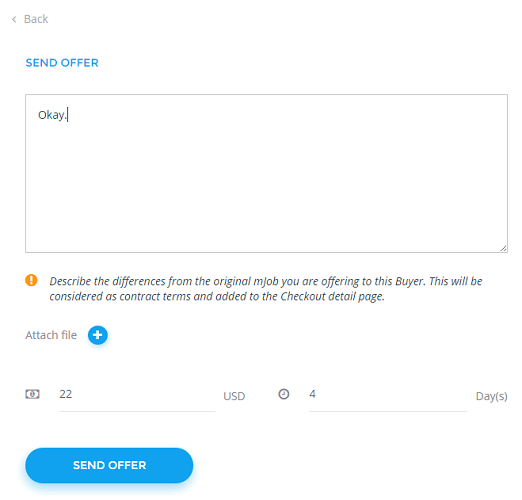
3.2 Agree & send offer
- Seller chats with buyer about the Custom Order.
- Seller fills in the offer with final details.
- Buyer receives offer
- Buyer receives the offer from seller. (And Email notification)
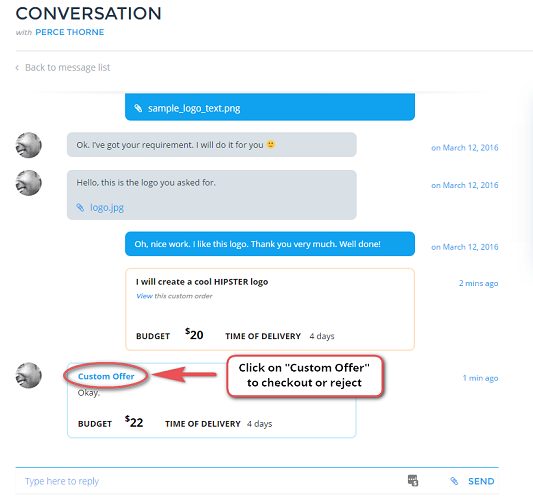
- Buyer has 2 options: Reject & the Custom Order disappears. Or Accept & Checkout as for normal orders.
- Buyer’s decision
5.1 Reject the offer
- Buyer states the reasons for rejecting the offer.
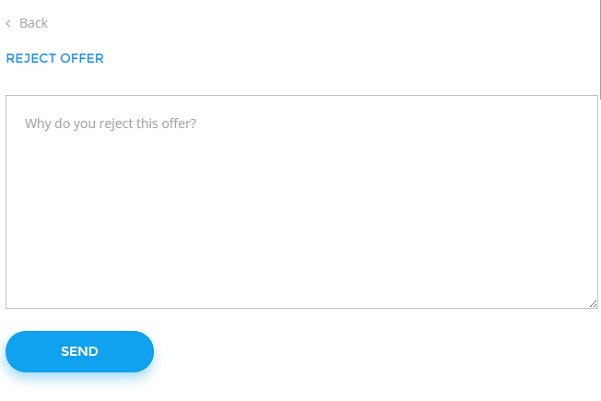
- Seller will see the message of rejected order. (And Email notification)
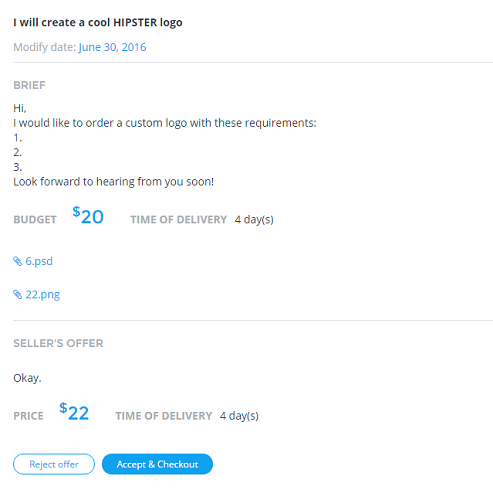
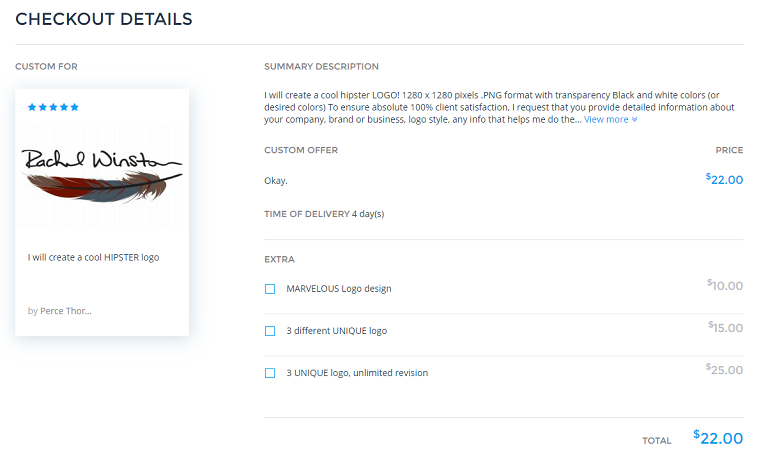
5.2 Accept & checkout
- Buyer accept the final offer and process to checkout. The custom order is active and seller can start to work on it.
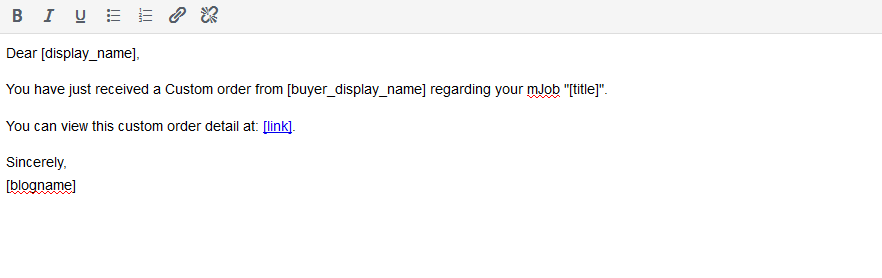
4 new mail templates for Custom Orders
Mail templates can be found in your Dashboard (Engine Settings > Settings > Mailing).
- Sent to Seller when he receives a Custom Order
- Sent to Buyer when his Custom Order is declined
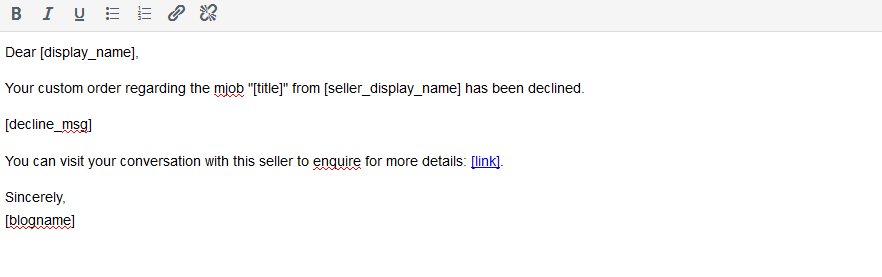
- Sent to Buyer when his Custom Order has an offer from Seller
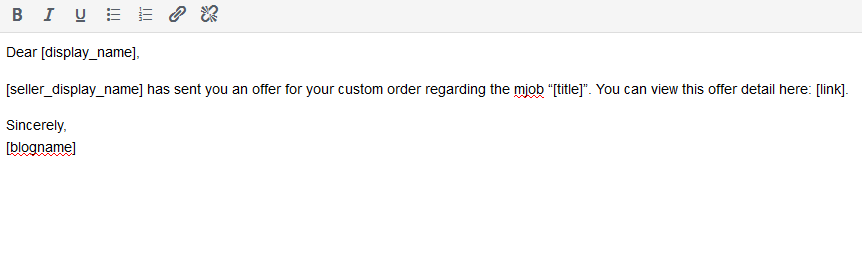
- Sent to Seller when his offer for the Custom Order is rejected by Buyer
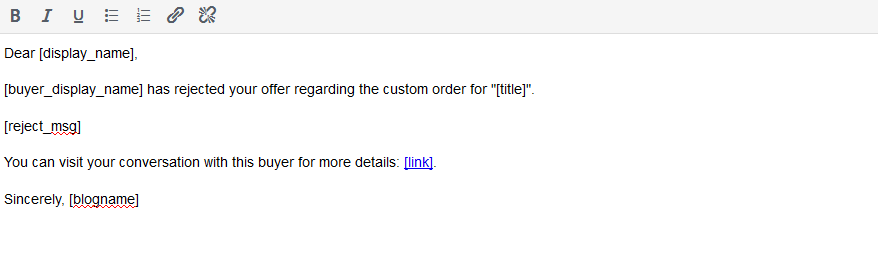
You can use the default content or customize it by your own words. If you happen not to see mail contents, click on “Reset to default”.
Use Credits to pay for listings & orders
Before the arrival of Credits, there are 3 payment methods integrated on your site: PayPal, 2Checkout, and Cash. Credit payment method will allow users to use credits in Available fund to pay for orders and mJob listings. The latest addition of Credit payment brings relevant benefits to you and your users.
The fewer transactions, the less painful, the safer
Paying by Credits allows for a more convenient and faster payment flow.
- Users could pay right away by credits available in their account without having to rely on external gateways like PayPal or 2Checkout. It especially helps when users want to pay for an order but don’t have enough money in PayPal account whereas their available credits are many. If it was before credit payment, users would have to withdraw money (which takes time) and then use it to pay for orders. With credits, withdrawing step is reduced making the flow faster.
- In reality, paying by credits only change the displaying number in user’s revenue stats, while the actual money is safe in your account. It is only when users request money withdrawal that actual money transfers are involved.
- Who’s gonna get the most benefits using Credits? These would be users who actively involve in both roles as a buyer and seller. As a seller, he will earn credits by providing mJobs. Then as a buyer, he uses earned credits to buy other mJobs.
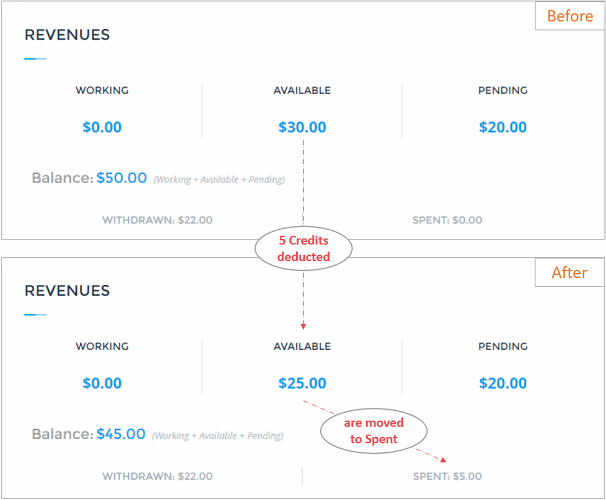
Updates in User Revenue Report
To have the best fit with the addition of this new payment method, Revenue report in user’s dashboard is modified as well. A new section is added in revenue report – Spent. This section shows how many credits users have used to pay for orders. The number of credits users are allowed to use is in the Available column. Hence, from now on, users will be able to know not only how many credits they have earned but also how many they have spent.
Activate & pay by Credits
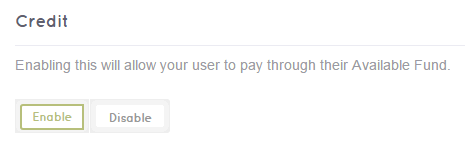
- Enable Credit payment in Dashboard (Engine Settings > Settings > Payment)
- Pay by Credits
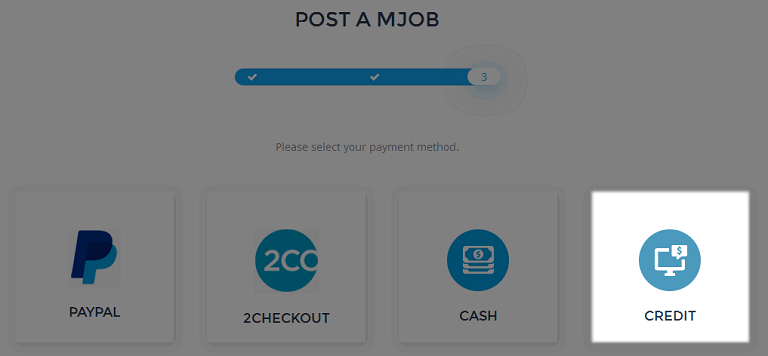
- Post a mJob: At step 3, choose Credit to pay.
- Order a mJob: Process to Checkout and then choose Credit to pay.
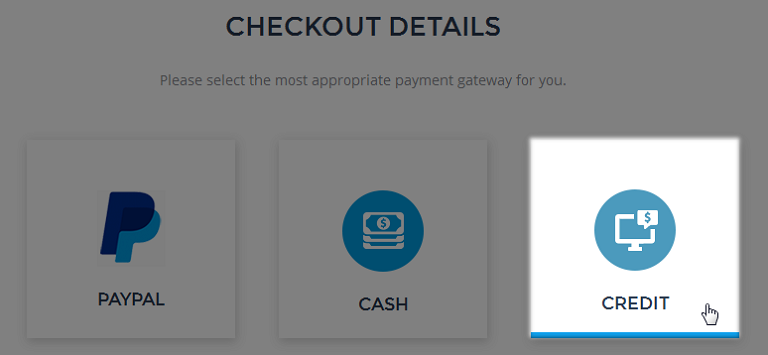
Since 2CheckOut prohibits selling Products/Services as an Agent for a Third Party (https://www.2checkout.com/policies/prohibited-product-list/), 2CheckOut can only be used for selling package to post mJobs in your marketplace and is not available when users order mJobs.
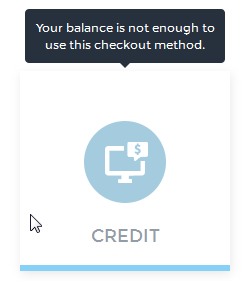
- Note: If your available credits are not enough to pay, you’ll see this notification:
- Enter the Secure code to pay
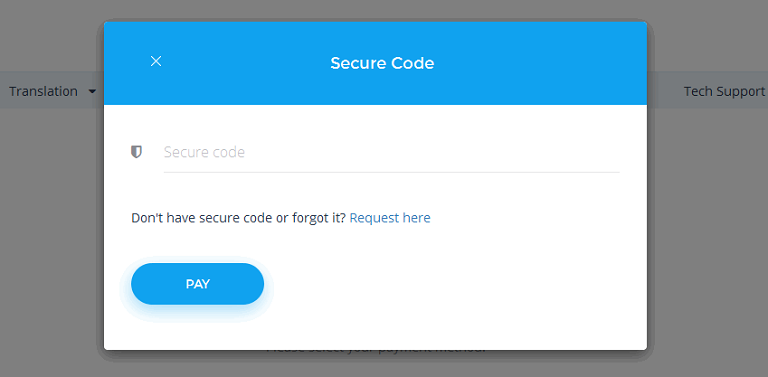
Users use the same Secure code for withdrawal request and for credit payment. If users have requested a secure code before, they also use that code in this step. But if they don’t remember it, just Request a new one pressing “Request here” like in the picture and the code is sent to user’s email.
- Revenue report
The used credits are transferred from Available to Spent.
Hope this guide can give you an overview of major changes in MicrojobEngine version 1.1 so that you can use these features to best serve your micro job website.
If you have any questions, don’t hesitate to leave us a comment. We’re happy to answer you!

I s there a way to give free credit to users?
Hello Fritz,
According to the default workflow of the MjE theme, users must work to earn credit. And it’s such a pity but there no other ways to give free credit to users as it’s related to the workflow.
Hope it clarifies your concern.
Hi, i have 2 questions.
1- i need that costumer buy credit to pay for a job. I what to use only credit on the site. After the costumer approuve the job then i will pay the seller.
2- I need the site in french Canadian how can i translate it. i have no skill in programing.
Thank’s
Hello Sylvain,
Concerning your questions,
– A user needs to work to earn credit for withdrawing or using it to order/post job later is the current workflow of the MjE theme. It’s such a pity but there’s no temporary suggestion that I can offer you on this matter.
– The theme provides a translator tool which can help you translate all text in your website.
Please go to Dashboard => Engine settings => Themes options => Translation => Choose a language (Website language & Translator language) => Find the field (Hit Ctrl + F and type in the keyword) then translate the text.
Hope it helps!
Can I integrate another more convince payment gateway to this theme? Because 2checkout is not currently available for my country. Thanks.
Hi Anyia,
The good news is that we are working on Stripe payment gateway for MicrojobEngine. The new feature will be available on Nov 29th. You can take a look at our plan for Stripe gateway in this article . Please let us know should you require further help.
Regards,